When you ordered a KVM VPS from us, you will have access to our KVM control panel.
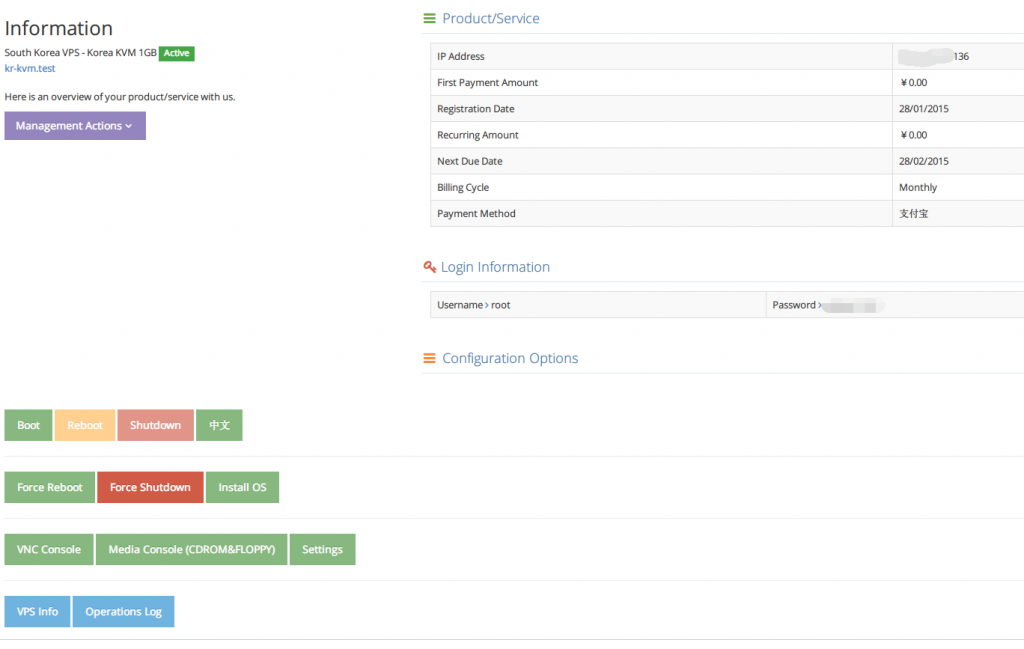
The buttons in the left lower are used to manage the VPS.
We do have automatic OS installation for our clients, however, you can also install via ISO by yourself.
We are here today to explain how to install your own OS via the panel.
1. Click the Media Console.
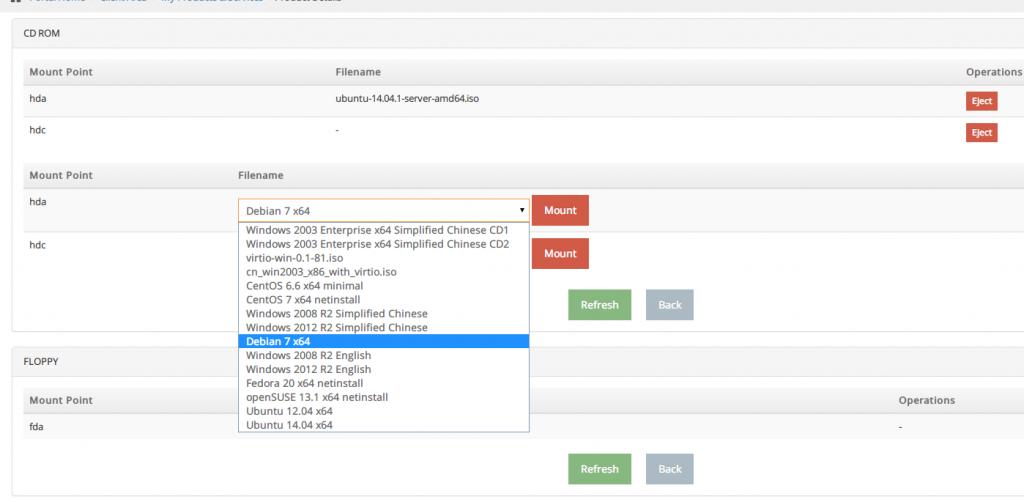
2. Select your preferred ISO and mount it (take Ubuntu 14.04 x64 as an example). If you want to use your own ISO, please open a ticket with your direct ISO link.
**Remember to mount the virtio ISO if your OS does not have virtio by default (e.g Windows).
3. Click Back, and Boot the VPS.
4. Click VNC Console.
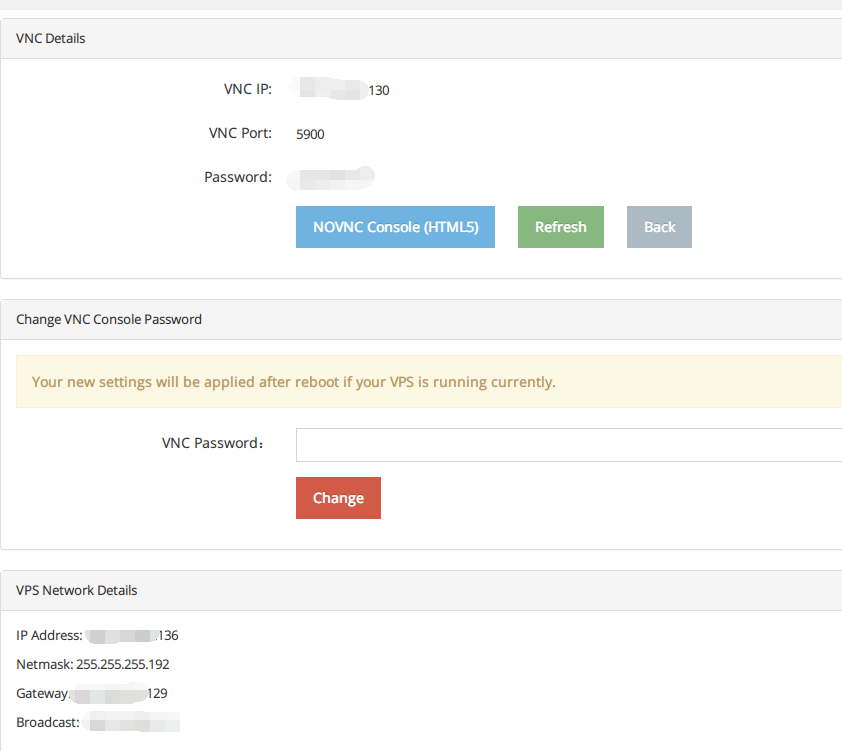
You can see the VNC details and network details here.
5. Use NoVNC if you are browsing with a modern browser, otherwise connect via your familiar VNC client.
6. Install the OS. Please install your OS to Data Disk, and leave the System Disk idle. If the install process cannot find the hard driver, please load the scsi driver from virtio iso.
7. We do not have DHCP server enabled, please configure Network during installation.
8. Everything done, enjoy your server!
Should you have any questions, feel free to contact us :)
